.jpeg)
You may have seen absolutely amazing mixed reality setups from creators like TougeVR, Ana Burn, LSToast and Naysy, and maybe you’ve wanted to dabble into mixed reality yourself. To those who might not be as familiar, mixed reality combines your real world camera with a video game, giving the illusion that you are inside of it. Without going into too much detail, it almost works like layers in Photoshop - elements of the game are different layers, as is your IRL camera.

There are two different methods you can use to remove yourself from your background - having an actual physical green screen setup or using AI background removal like Nvidia broadcast.
We’ll break down each below.
Nvidia Broadcast
A decent alternative to LIV’s AI background removal (RIP) is the NVIDIA broadcasting software, which you can use outside of just mixed reality as well. This should go without saying but in order to use it, you must have an Nvidia graphics card, if you head over to their website they list the compatible GPU's and other system requirements, along with the download link.
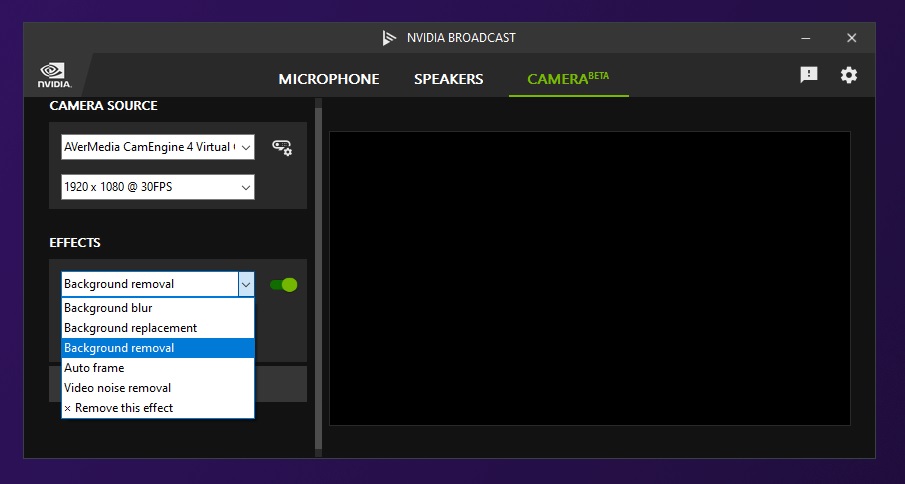
To access the auto background removal tools, flip over to the camera options, select the camera you want it to use, the resolution if available, then under 'effects' select 'background removal'. You can stack multiple effects if you also want to take advantage of NVIDIA's white noise removal etc, but the more you add the more taxing on your PC it will be.
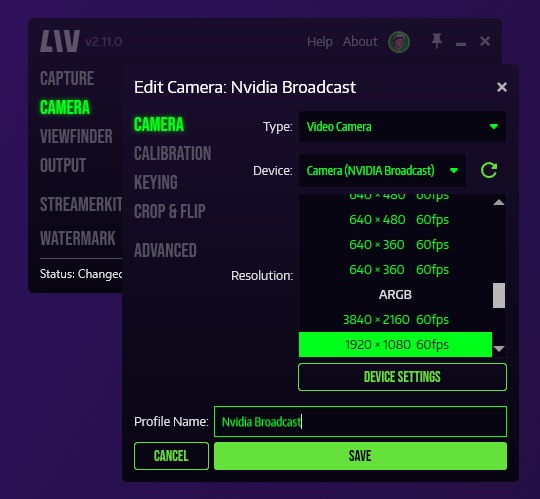
For mixed reality and running it through LIV, launch mixed reality under 'PCVR', select 'camera' then select a profile or create a new one. Next to camera type, select video camera, then for device select camera (Nvidia broadcast). Select your resolution, UNDER ARGB or you won't get the transparency! Click save, then calibrate as you normally would. (Note: You can use this method with Quest on PC as well if you wish, the same settings apply - the UI just might look a little different!)
If you need to do any fine tuning you can actually go into the LIV keying menu and adjust threshold or smoothness as needed.

Physical Green Screen Setup
First let’s start with expectations: As a beginner enthusiast, I don’t recommend going all in right away, painting your walls green, getting the highest end most expensive equipment you can. I actually encourage you to start off relatively affordable ($200 or less even!) to learn the ropes of mixed reality, get the hang of it, and of course to find out if this is something you are truly passionate about before you blow $1000+ on accessories that will later end up being background furniture.
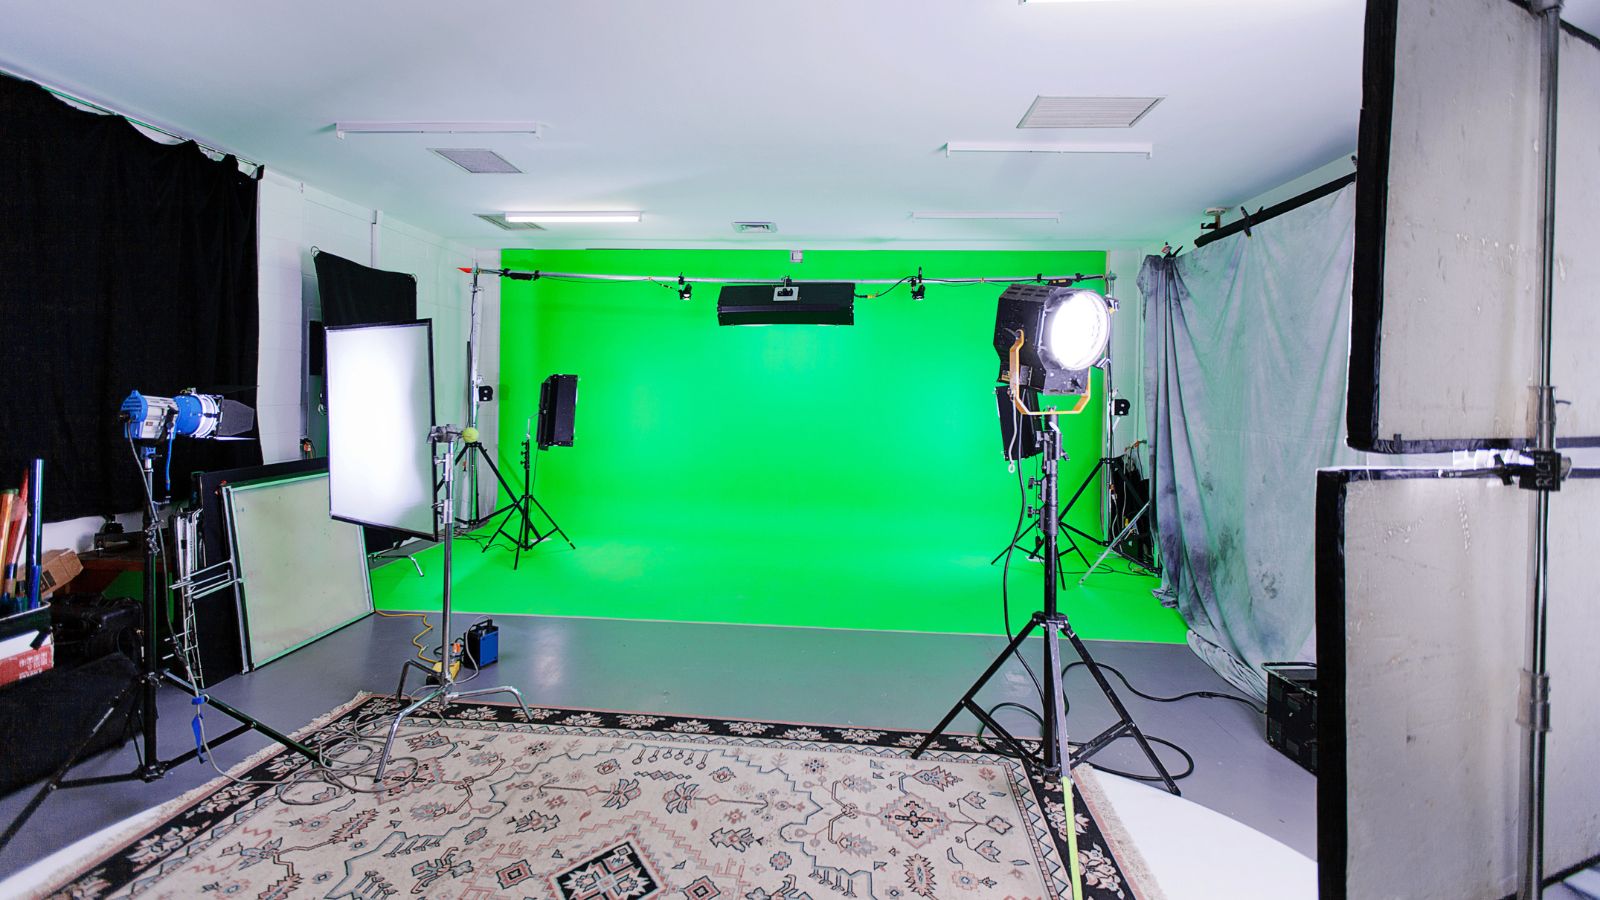
The Green Screen
There are a couple of different ways you can hang a green screen, depending on your preferences and if you own or rent your home.
The most portable and less intrusive method is to purchase a generic photography backdrop stand (around $20-45). That way you won’t be nailing anything to the wall or painting anything, you can move it where you’d like for the best angles and you can take it all down if it’s in the way or you decide you don’t want to use it anymore. Make sure that the stand you purchase is both wider and taller than you by a few feet - consider the fact that you might be moving around a lot while you are in VR, your arms might be above your head or outstretched and you don’t want those getting cut out!

Other affordable creative green screen holders include curtain rods, home made PVC pipe backdrop stands, tape and thumbtacks, but regardless of how you decide to mount it make sure the sheet is as tight as possible to minimize any wrinkles which can affect your keying.
For the actual green backdrop I recommend a muslin sheet or fabric that is at least 10x12ft (around $15-$45), you want to make sure that again there’s enough length that your up and outstretched arms won’t get cropped out, but also that you can stand on it if you want full body mixed reality!
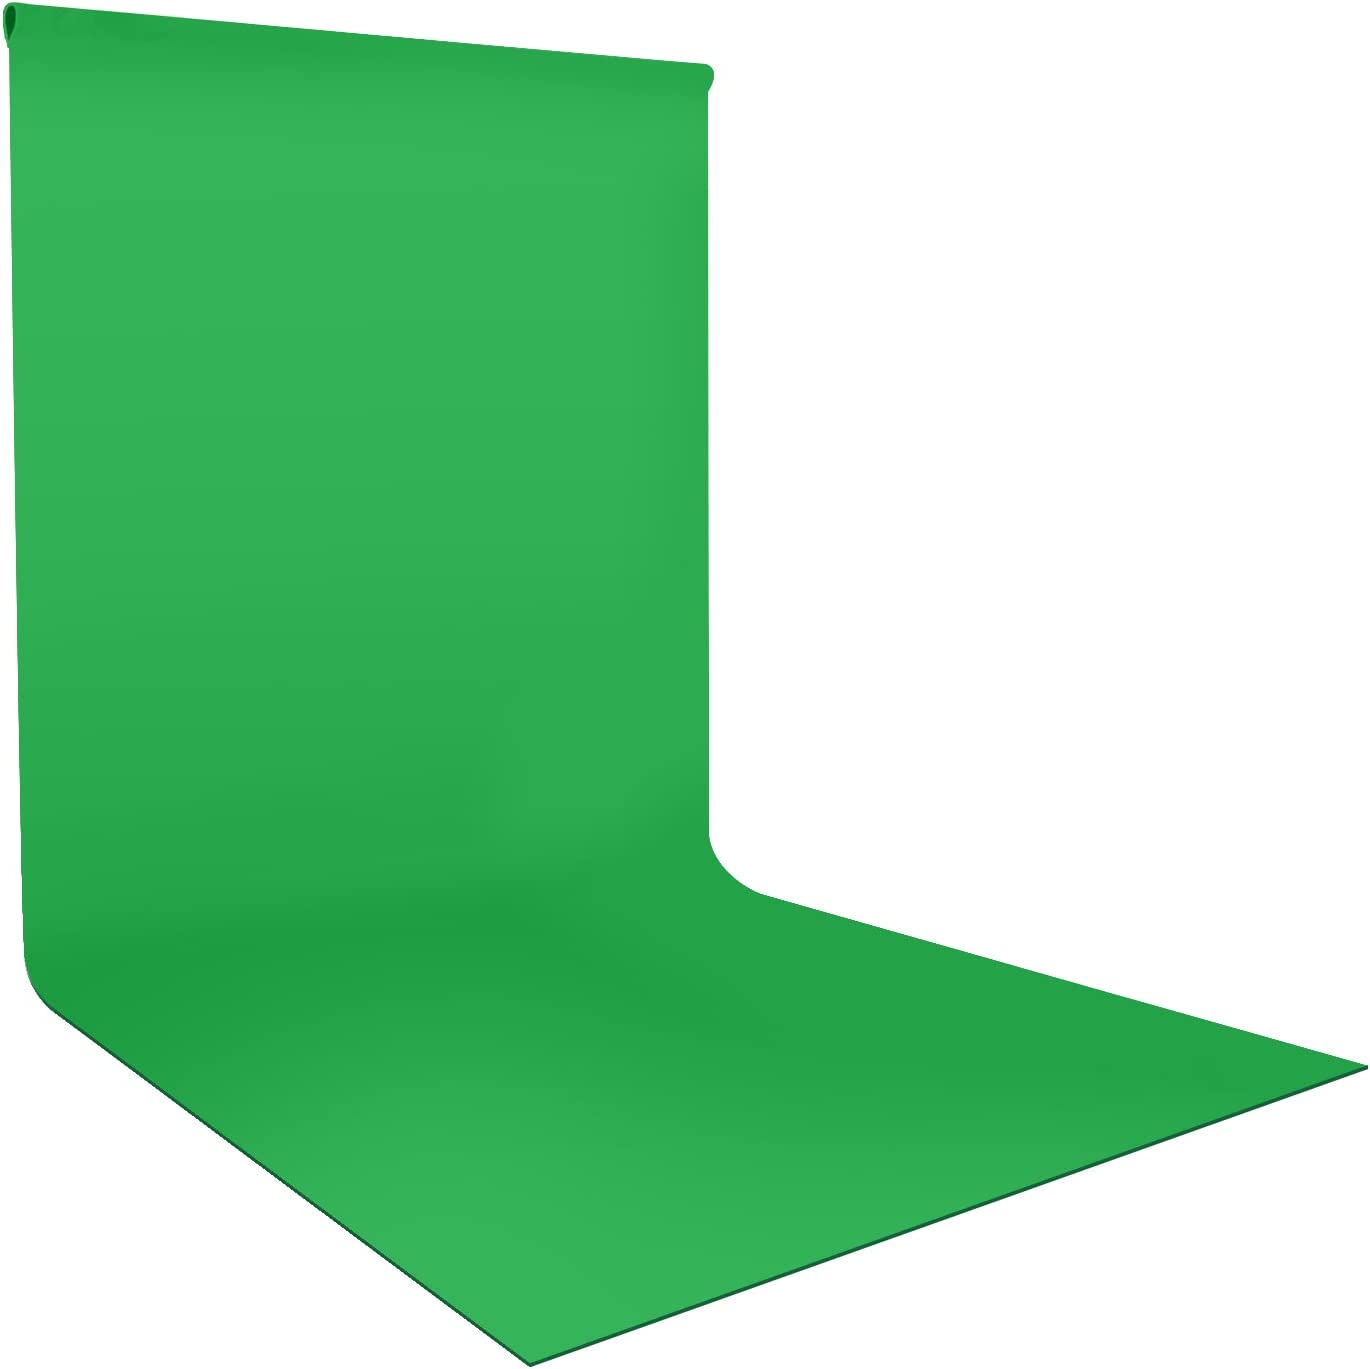
If you are on a slippery surface and standing on your green screen causes you to slide around, you can also substitute it with green foam puzzle piece mats. Price varies depending on how much space you want to fill.

Lighting
Lighting will be crucial in getting that smooth chroma key effect for mixed reality. You’re going to want bright, even lighting on both the green screen itself, and the subject.
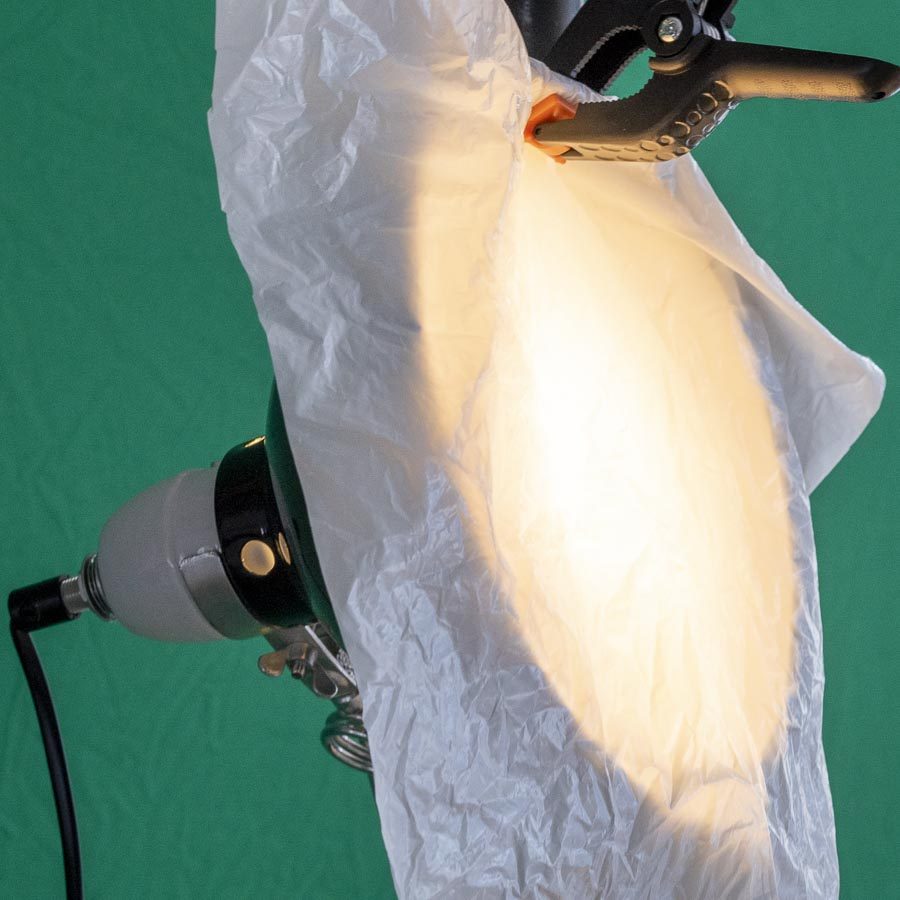
While they aren’t the prettiest, the cheapest option you could start with are clamp lights purchasable from a local hardware store. When I started off, I used 4 for more variance and flexibility but it will depend on how large your setup is as to how many you'll need. I used 1,100lm, 5000K daylight LED light bulbs. To diffuse the light and have them function more like a softbox, use some parchment paper, cut them into circles larger than the rim of your clamp lights then simply clip the paper to the edges. For even softer lighting, just add more layers.
You're also going to need something to clip the clamp lights to, and for that you can purchase cheaper tripods (just be aware you may have to weight them down if they are *too* cheap - some of the cheaper ones are very lightweight). I've also clipped these lights to shelves, furniture, etc. Whatever I had around the house that was portable or close to my green screen setup.
Otherwise, a good upgrade from cheap clamp lights would be to purchase yourself some soft boxes or LED panels (at least 2). NEEWER in particular is a more affordable brand that can be found on Amazon.
Avatars
If all this sounds way too complicated, you can use another solution on the LIV app… avatars! Avatars don’t require a green screen, camera, lighting - just yourself, your headset and your controllers! You can be as anonymous as you want and you don’t even need to wear pants. To find out more about avatars, check out our helpdesk articles here.
-----
Creating a green screen setup for mixed reality doesn't have to be expensive. Start out affordable, once you use your equipment more and discover it’s faults or feel like you are ready to improve your workflow, upgrade! You’v got this - LIV on creators!