.jpeg)
Are you interested in using VRChat and want to show off your unique style? Look no further than the LIV Store, where you can find a wide variety of avatars that are sure to suit your preferences. But once you've purchased an avatar from the LIV Store, how do you go about importing it into VRChat? Don't worry, we've got you covered with this comprehensive guide.
Note: In order to be able to upload avatars to VRChat, the ‘New User’ rank is required. To get this rank you’ll need to gain some time in VRChat first. The amount of time is not determined, but it’s estimated to be between 12-24 in game hours. As long as you put some time in VRChat and do not violate any community guidelines, it shouldn’t take much time at all! Keep in mind you will also need to be logged in via a VRChat account, and not through Steam only.
Buy your LIV Store Avatar
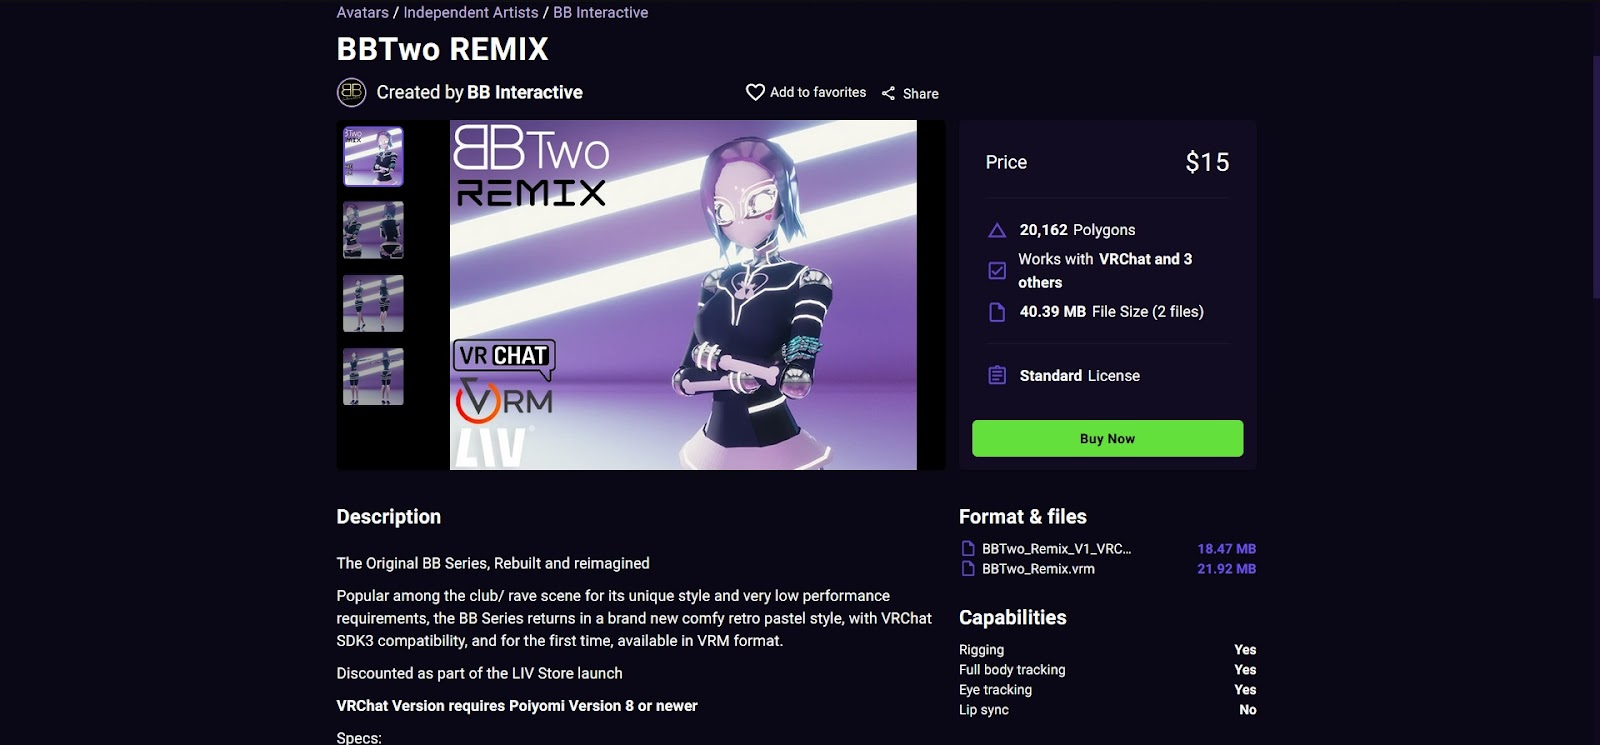
First, head over to the LIV Store and find the avatar that you want to use. If you want an avatar specifically for VRChat, make sure that it is tagged for use in VRChat. The store has an extensive collection of avatars that are sure to impress your friends and strangers alike. Once you've made your purchase, you'll receive a link to your purchase order where you can download your avatar.
Once you've downloaded your avatar, extract the zip file contents to a location on your computer that's easy to find.
Download the VRChat Creator Companion
Head to the VRChat download page here and download the creator companion.

Install and Open the VRChat Creator Companion
Once the program is open at the top you will see a ‘Path to Unity Editor is not set, you will be unable to open projects.’ warning. Click the ‘fix now’ button.

If you do have Unity already installed, click the ‘I already have Unity’ button and navigate to the Unity.exe for the creator companion to use.
Install Unity Hub and Unity
The first step in importing an avatar into VRChat is to have Unity installed on your computer. Unity is a game engine that VRChat is built on, so it's necessary to have it installed to be able to upload an avatar.
Assuming you don’t already have Unity, click ‘install Unity’. The creator companion does a great job walking you through the steps of what you need, but we’re going to show you here too.

First, download and install the Unity Hub from Unity’s website here.
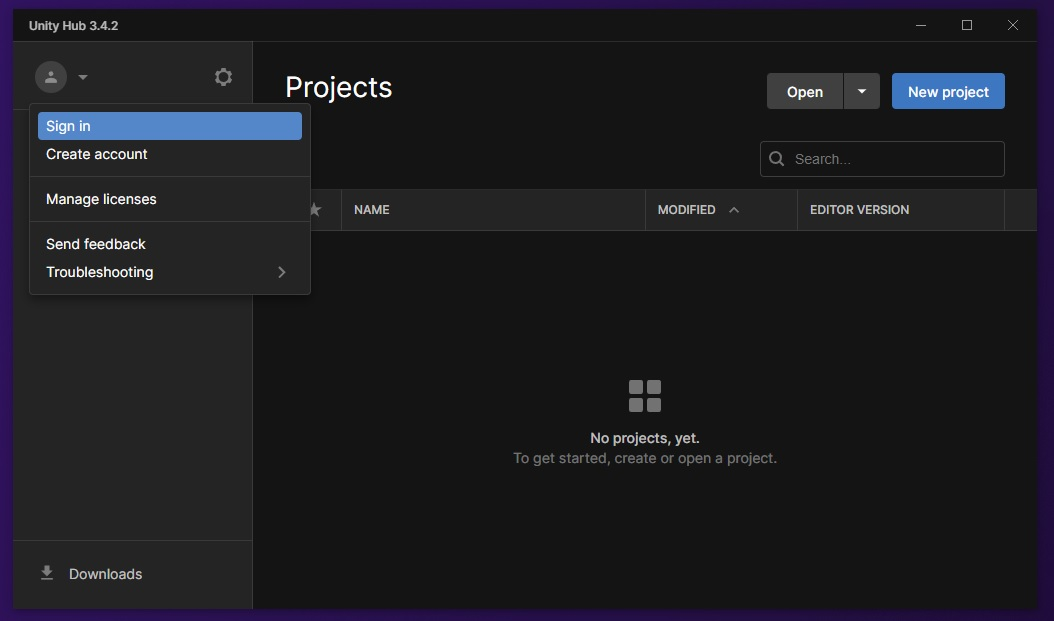
Next open the Unity Hub and you will need to activate your Unity license. This is free but we will need to make a Unity account to do so. Click on the account icon on the top left of the app, then either sign in if you already have an account, or click ‘create account’.
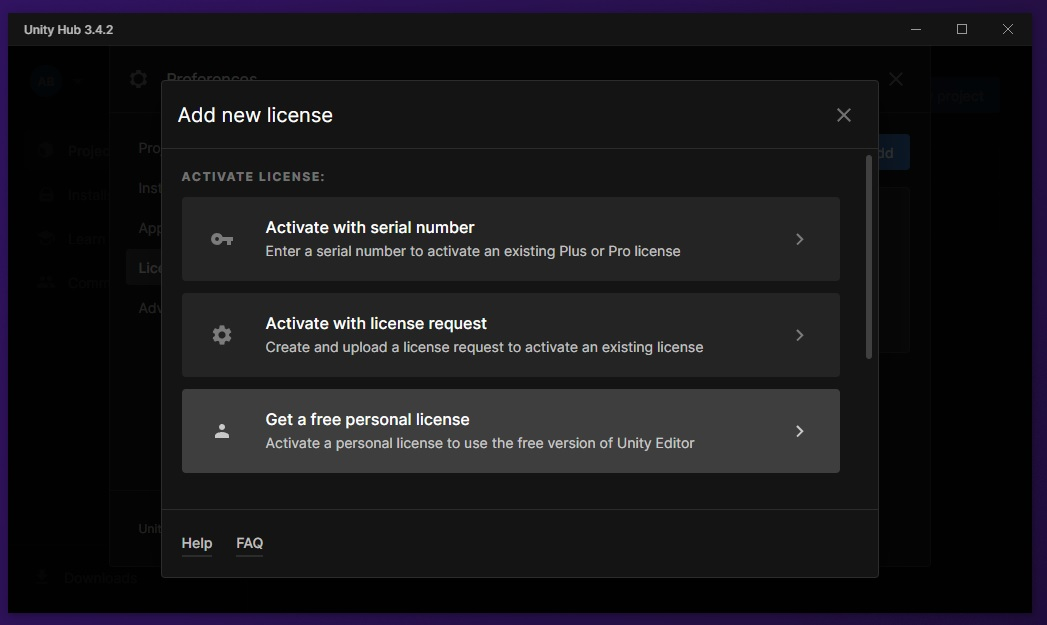
Once you are signed in, click on the ‘preferences’ cog next to the account icon on the Unity Hub. Go to Licenses>Add.
Select ‘Get a free personal license’ and accept the terms of service.
Back on the VRChat creator companion, select ‘I have installed the Unity Hub’.
Now we’re going to install the correct version of Unity that you need. Click the install button listed, and give it some time.

Eventually the screen will update to let you know that Unity has been installed, then click ‘continue’.
Create a New Avatar Project
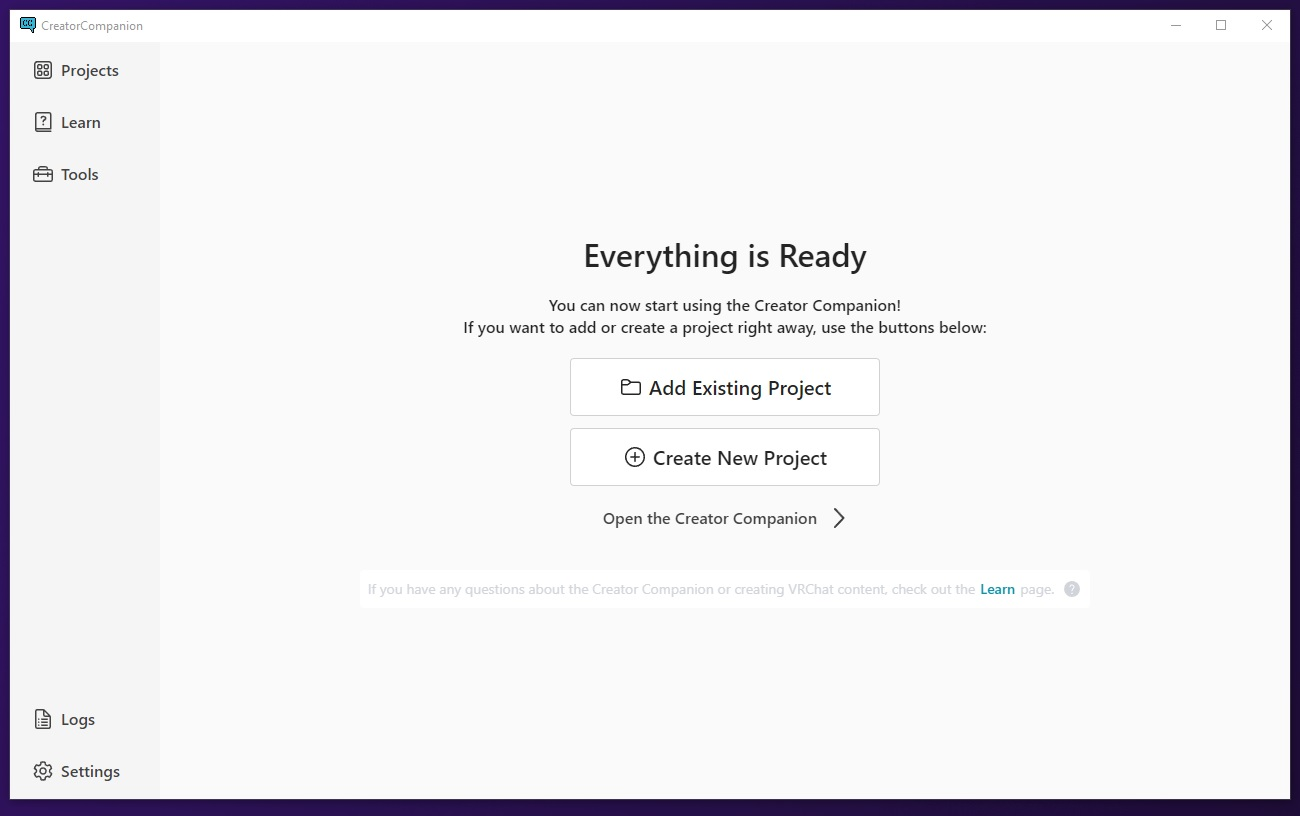
You’re now ready to create a new project!
Select ‘create new project’
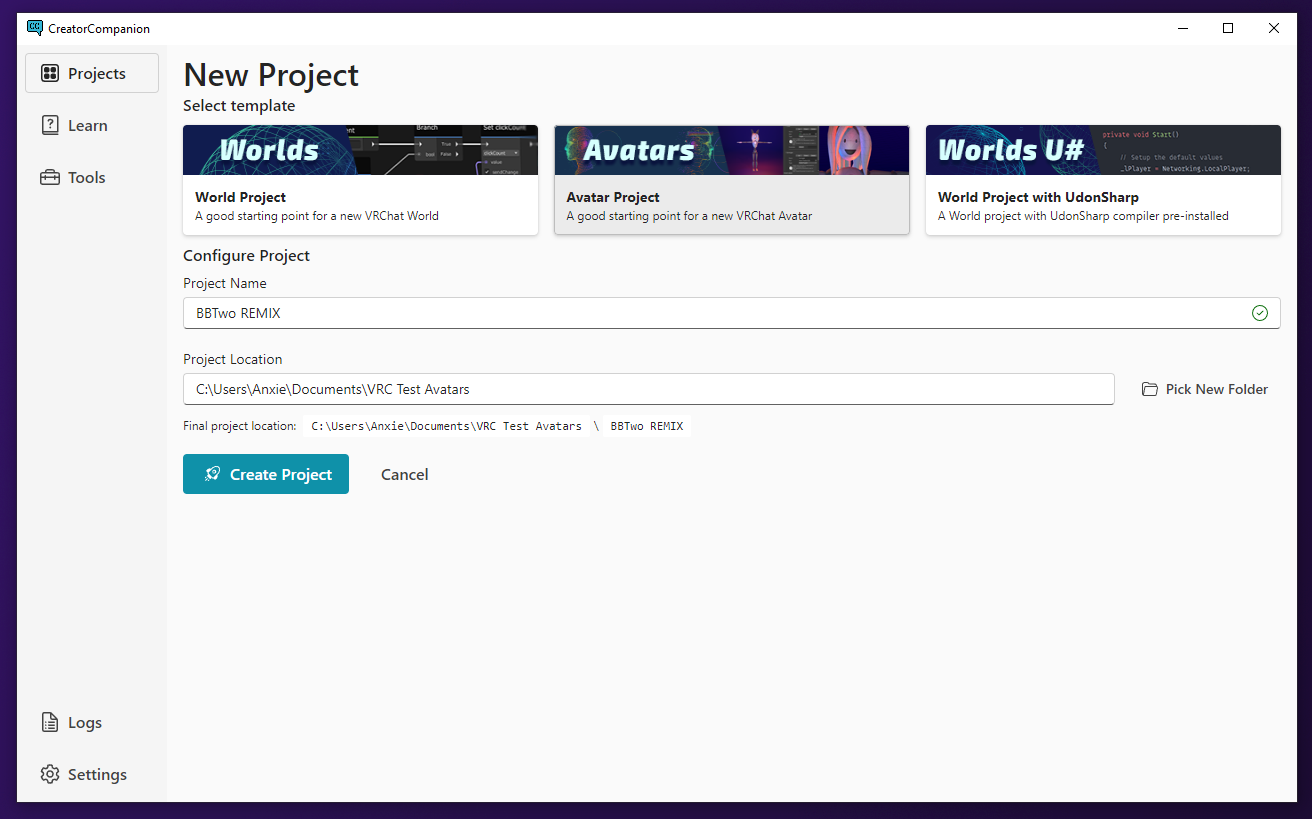
Select ‘avatar project’ up at the top, name the project what you’d like (here we just used the avatar’s name), select the location you’d like to save it to, then click ‘create project’.
Up at the top left click ‘open project’ and Unity should open.

Import The Avatar To Unity
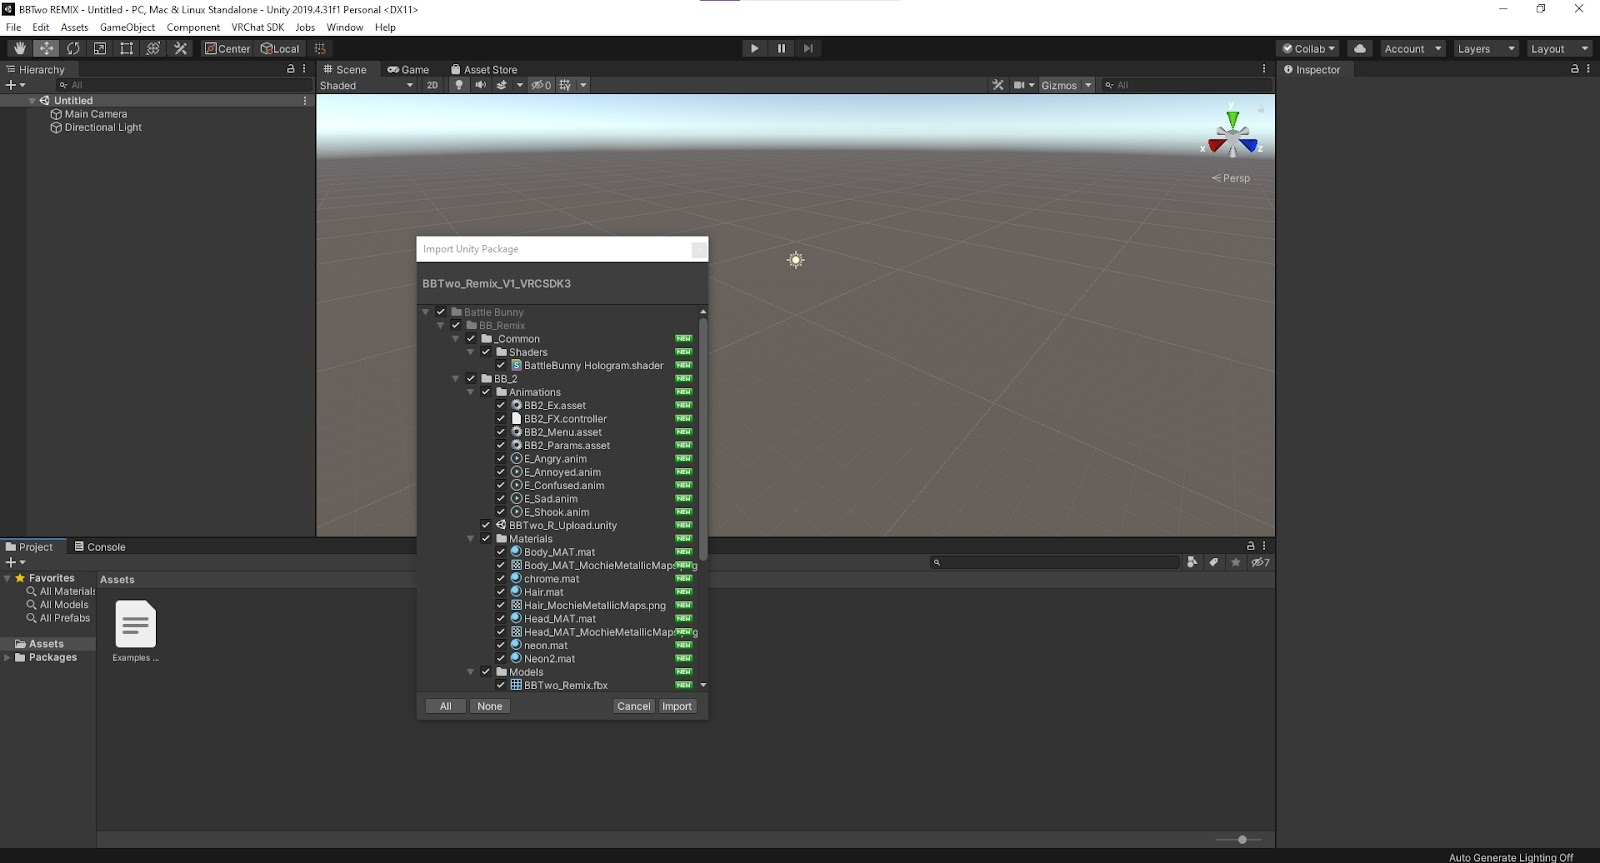
With Unity open, drag and drop the Unity package file(s) you received from the seller into the assets section of Unity (at the bottom). An ‘Import Unity Package’ window will pop up, click ‘import.’
If you read the LIV Store listing for this avatar closely, you’ll notice that it requires some special shaders called ‘Poiyomi’. You can download the Unity package file for these shaders here.
Poiyomi is very commonly used by many avatar sellers.
Once that is downloaded, drag the Unity package file to the assets section again and import, just like we did for the avatar.
Each seller is different, some may include a link to where you can download the shader package, some may include it in their zip file with the avatar assets. It’s very important to read each description!
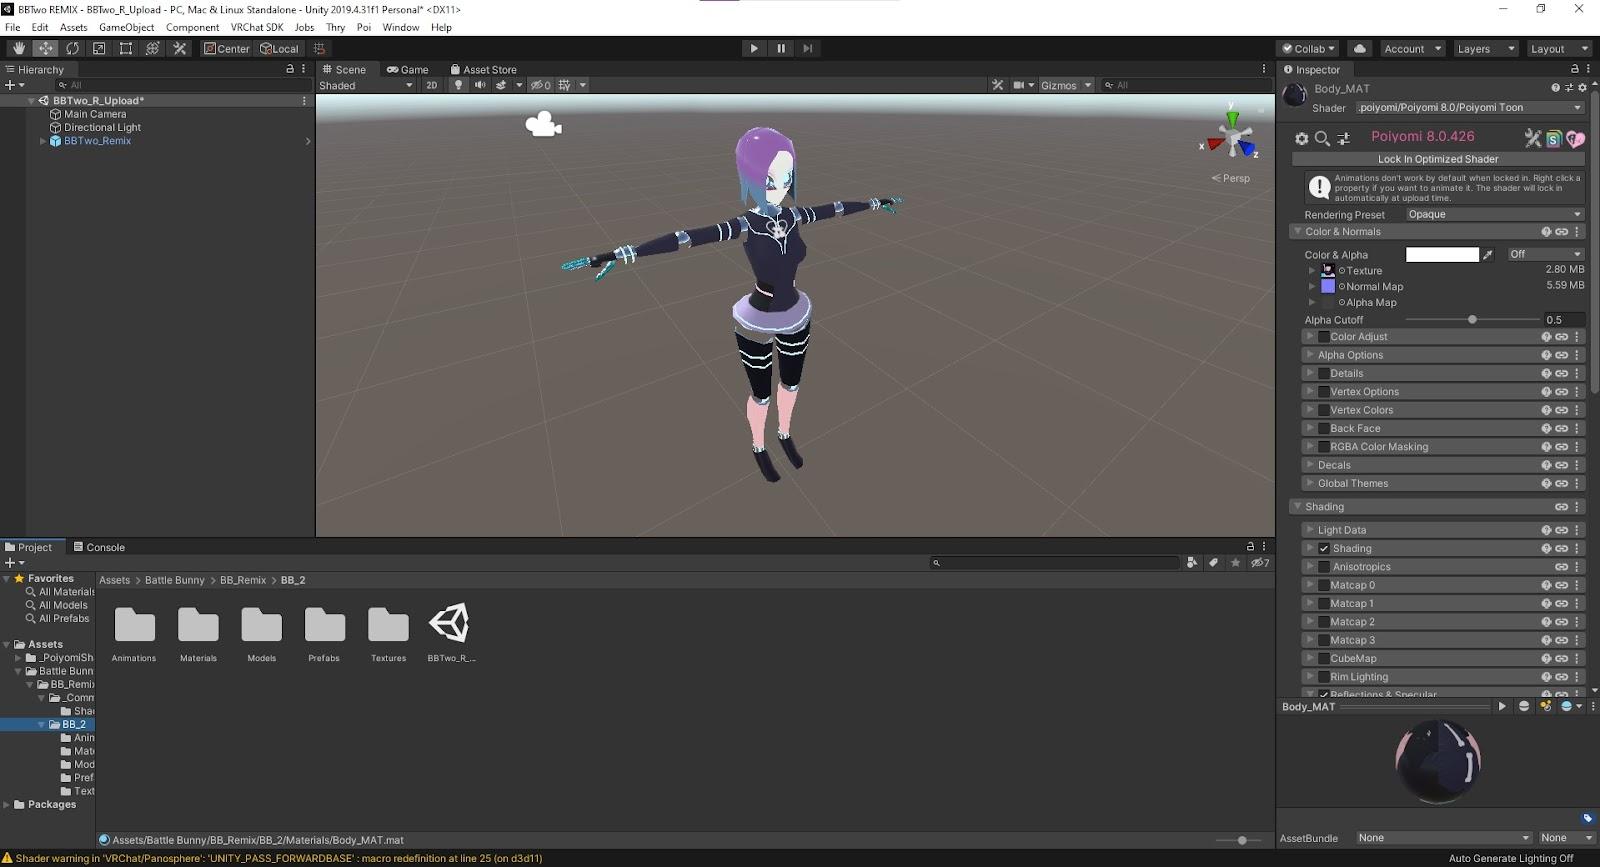
Under assets, navigate through any folders that may be there (or they might not) until you find an icon that looks like the Unity symbol and double click it. In our case, the seller was kind enough to label this with the name of the avatar, making it even easier to find.
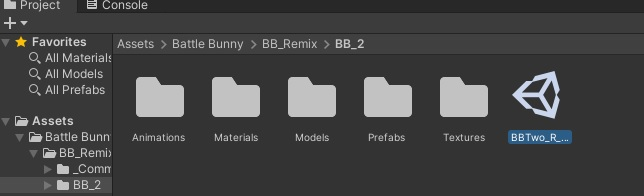
You should now see the avatar fully textured in your Unity scene.
Import the Avatar to VRChat
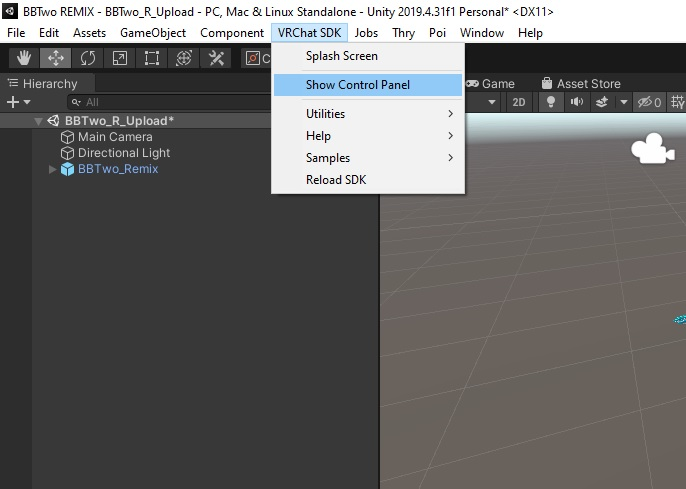
At the menu bar on the top you will see an option that says ‘VRChat SDK’. Click that, then ‘Show control panel’
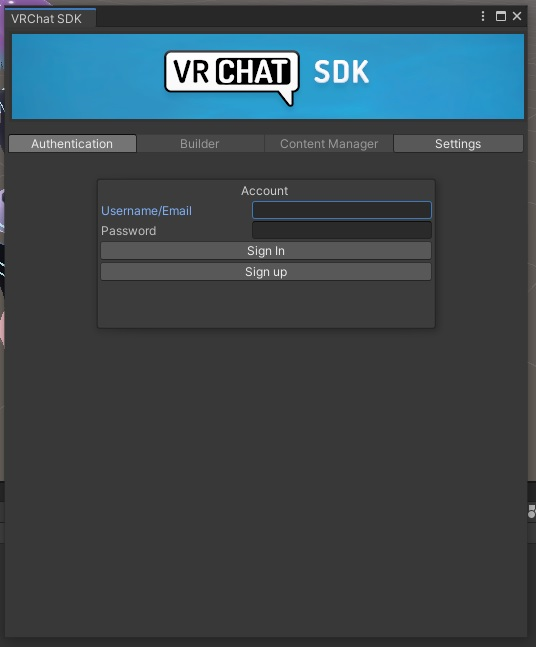
Log in to your VRChat account.
Go to the builder tab and click ‘build and publish for windows’

A new screen will appear. Change the name to the avatar’s name (or something you will remember it by in your library), make sure that sharing is set to ‘private’. (This is out of respect for the seller, and most will require this in their licensing)

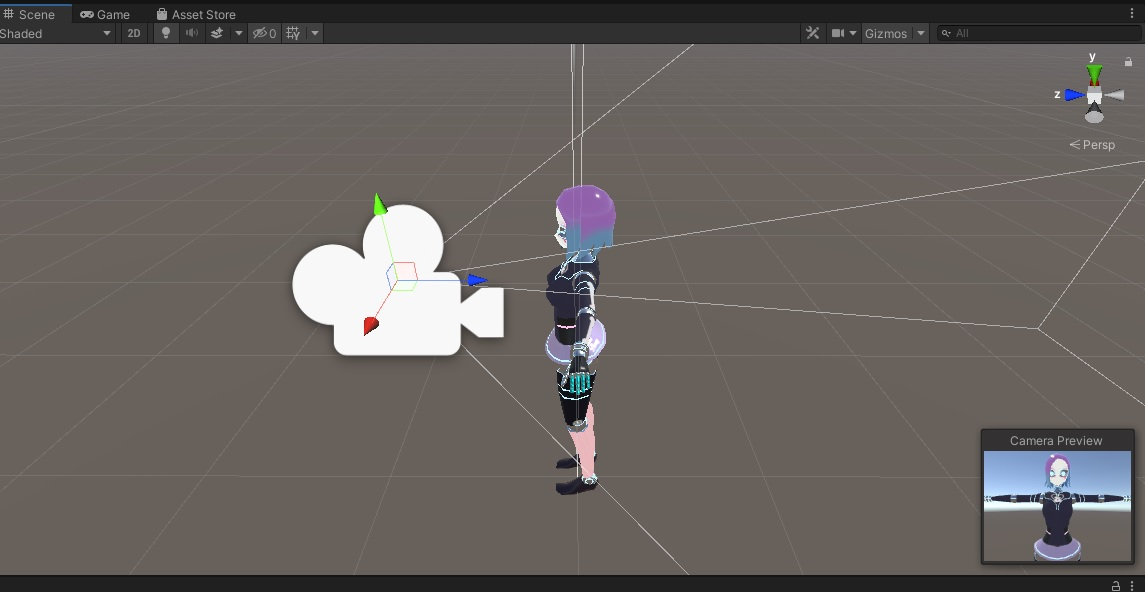
If you want to change the avatar preview icon head back into the ‘scene’ tab and move the white camera icon around by the axis arrows (green, blue and red) until you find a placement you like.
Finally, back in the ‘game’ tab click the checkbox, then ‘upload’.

Check Out Your New Avatar in VR Chat
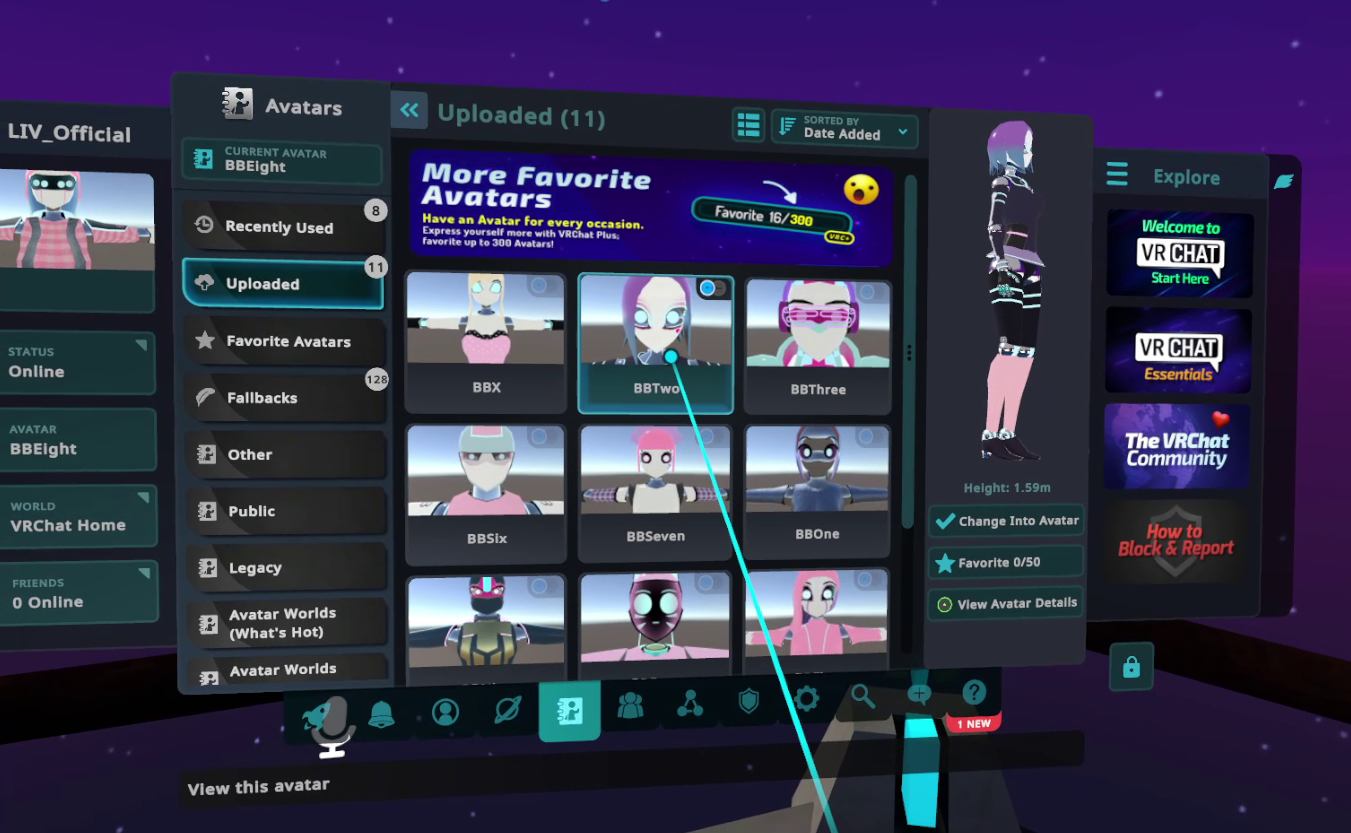
Launch VR Chat and bring up the in game menu. Head over to the avatars section, then find your newly uploaded avatar under the ‘uploaded’ section!
Quest Avatars
Some sellers will provide a Quest version of their avatars for players who might be playing the Quest only version of VRChat. The Quest version of VRChat has more limited avatar requirements than the PCVR version. This is due to the fact that the Quest is a less powerful device and has less storage space.
The main differences in avatar requirements between the Quest and PCVR version of VRChat are:
- Maximum size: Quest avatars are limited to 200MB in size, while PCVR avatars can be up to 500MB.
- Polycount: Quest avatars are limited to 50,000 polygons, while PCVR avatars can be up to 200,000 polygons.
- Materials: Quest avatars can only use a limited number of materials, while PCVR avatars can use any number of materials.
- Physics: Quest avatars cannot use physics-based features such as cloth simulation, while PCVR avatars can.
Also note that due to the limitations of the Quest, Poiyomi shaders will not work with Quest avatars. For the sake of this tutorial we are going to continue working with BBTwo REMIX as an example, though it’s important to read the description of the avatars on the LIV Store to make sure the avatar can be used on the Quest version of VRChat.
The steps for uploading an avatar for the Quest version of VRChat will be the same as above with a couple of exceptions. You will use the same VRChat control panel in Unity to build and publish the avatar to Windows but ALSO Android - this is so both platforms will be able to see your avatar.
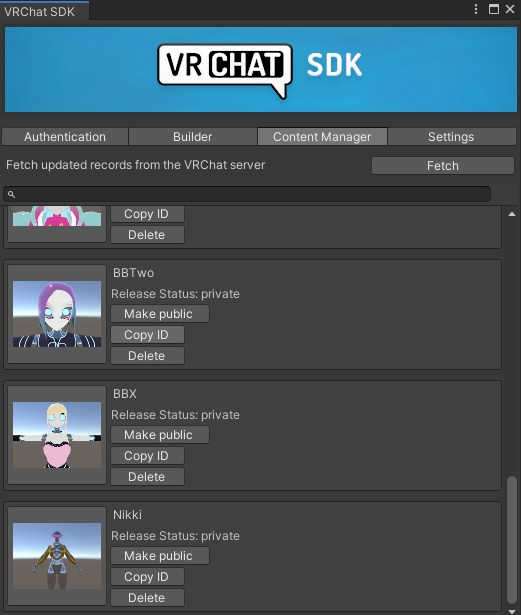
After you have followed the above steps and you have built and published for Windows, go to the content manager and find your newly uploaded avatar. Click ‘Copy ID’.
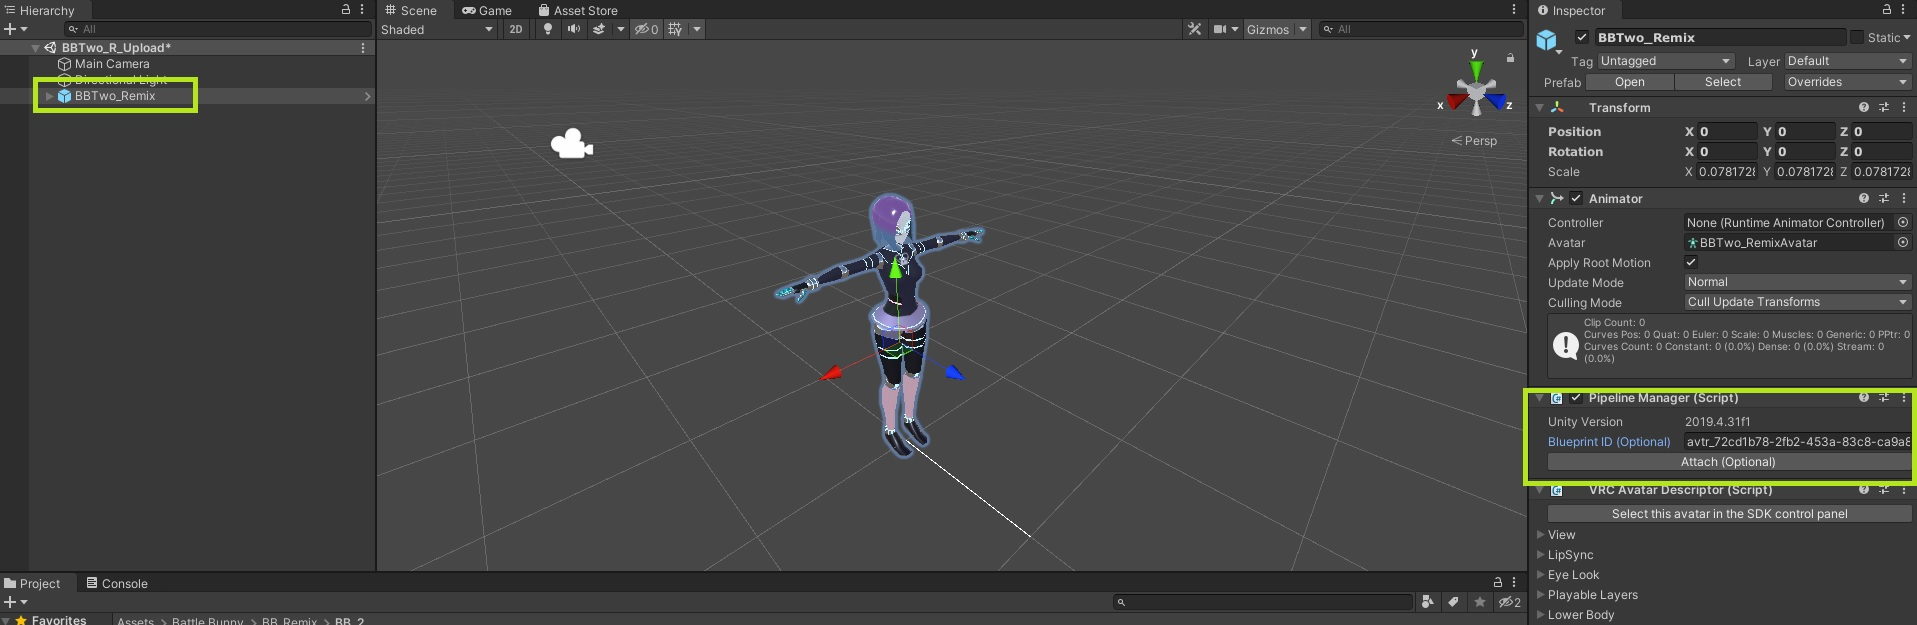
Click on the avatar’s name in the hierarchy on the left, then go to the inspector tab on the right and paste the ID you copied into the section that says ‘blueprint ID’. You may have to click ‘detatch’ first before you are allowed to input a new ID. Then click ‘attach’.
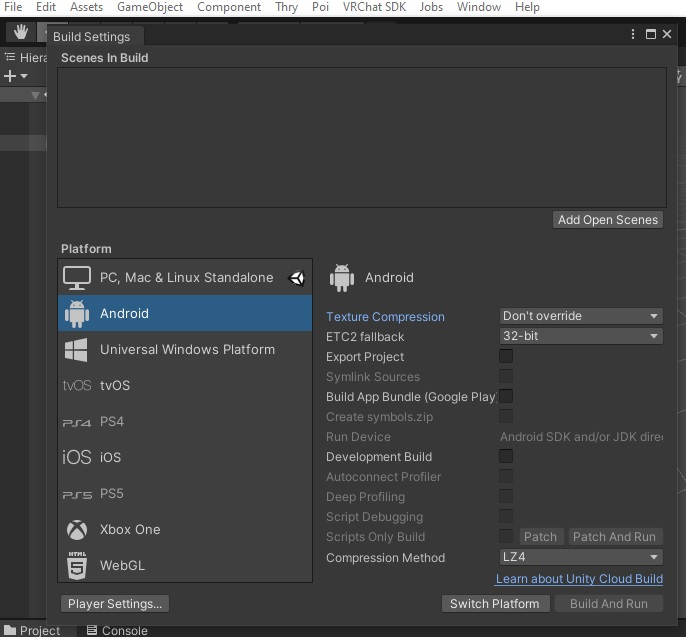
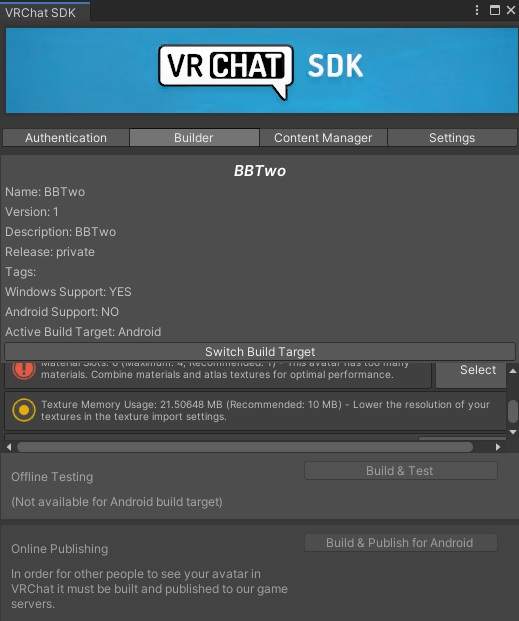
Go to file>Build Settings and click on ‘Android’ then ‘ switch platform’. You may get a prompt to install this, let it run as it may take a while.
Go back to the VRChat SDK control panel, and under the builder tab you should now see a ‘build and publish for android’ button. Click that, upload again, and you’re all set!
In conclusion, importing LIV Store avatars into VRChat can be a straightforward process that anyone can do with a little bit of patience and effort. By following these steps, you'll be able to show off your unique style in VRChat in no time. We hope this guide has been helpful for you, and we look forward to seeing all the creative avatars that you'll upload!