


If you're building a Unity game and want players to record gameplay, snap screenshots, or go live — from inside the app — you've probably already realized Unity doesn't ship this out of the box.
There's no built-in camera system for users. No recording pipeline. No "press a button and share a clip" workflow.
So you're left with three options: build it yourself, stitch together low-level libraries, or use something purpose-built.
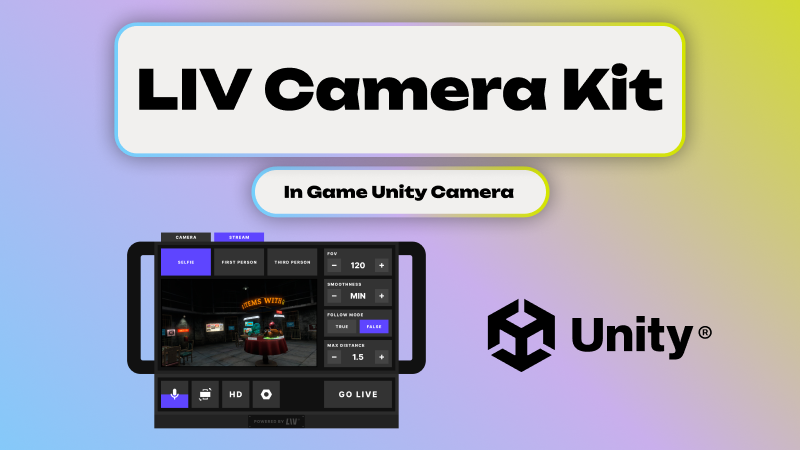
LIV is a production-ready in-game camera SDK for Unity designed for exactly this. It lets your users Spawn in-game cameras, record video, take screenshots, and live stream directly inside Unity and Unreal Engine applications.
Here's what each path actually looks like, and why most Unity developers end up choosing the SDK route.
What is in-game recording in Unity?
In-game recording means your users can spawn cameras inside the game world to capture video, take screenshots, or live stream — all without leaving the application, without OBS, and without you building a custom encoding pipeline.
This isn't screen capture. It's an in-world camera that the player controls.
The reason this matters is simple: the games winning on social media are the ones where players can create and share content effortlessly. If recording requires a separate app, a desktop, or technical know-how, most of your players simply won't do it.
Three ways to add in-game recording to a Unity app
1. Build it yourself in Unity
This means you're writing the full stack:
Rendering camera output to RenderTextures. Managing multiple camera rigs. Implementing video encoding per platform. Handling audio capture and sync. Designing the UI and camera controls. Optimizing everything for VR and real-time performance.
The upside is full control. The downside is that this is months of engineering work, ongoing maintenance across Unity versions, and a mountain of platform-specific edge cases — particularly on standalone VR hardware.
This makes sense if capture is your core product. For most teams, it's a distraction from the game itself.
2. Use low-level libraries (FFmpeg, WebRTC, native APIs)
These handle encoding or transport, but that's it. You still need to build the camera system, integrate with Unity's rendering pipeline, and design every workflow and UX element yourself.
FFmpeg is battle-tested. WebRTC is great for transport. But neither gives you an in-game camera. Neither gives you a record button inside a VR headset. You're assembling plumbing, not shipping a feature.
This path works when you already have engine-level capture sorted and just need the media layer.
3. Use an in-game camera SDK for Unity (recommended)
An in-game camera SDK provides everything in one integration: user-spawnable cameras, video recording, screenshots, live streaming, Unity-native workflows, and performance-aware capture.
This is what LIV provides for Unity.
LIV — In-Game Camera SDK for Unity
LIV drops into your Unity project and gives you:
User-spawnable cameras inside the Unity scene. In-game video recording. Screenshot capture. Live streaming directly from the app. VR-native camera workflows — third-person, spectator, mixed-reality.
It's built for Unity developers making VR games and social experiences, creator-driven or UGC-focused titles, competitive or spectator-friendly games, and applications where desktop capture is insufficient or flat-out impossible.
What can you build with LIV in Unity?
- ✅User-spawnable in-game cameras
- ✅In-game video recording
- ✅Screenshot capture
- ✅Live streaming from inside the app
- ✅Unity support for 2020.3+
- ✅VR-native camera workflows
- ✅No external capture software required
- ✅Meta Quest and PCVR support
- ✅Unity Prefab for quick and easy integration
The games driving the most recordings with LIV right now are social VR titles — Gorilla Tag alone generates over a million videos per month using LIV. But single-player games see real results too. Underdogs hit 10,000 videos in its first month with the camera.
The pattern is consistent: give players the tools, and they become your marketing team.
When should you use LIV in Unity?
Use LIV if:
You want plug-and-play in-game recording. Users need to control cameras from inside the Unity app. You want recording and live streaming without building infrastructure. You're targeting VR or performance-sensitive platforms.
Don't use LIV if:
You only need developer-only debugging capture. You're building a one-off prototype. Desktop-only recording is genuinely sufficient.
Getting started
LIV integrates directly into Unity projects and exposes in-game cameras, recording, screenshots, and live streaming to your users.
The bottom line
If you want users to spawn cameras, record video, take screenshots, or live stream gameplay from inside a Unity application, the fastest and most production-ready path is an in-game camera SDK.
LIV provides this for Unity out of the box — no custom capture, no encoding pipelines, no streaming infrastructure to build or maintain.
Helpful links
- LIV Developer Portal
- LIV Documentation
- In-Game Camera SDK Overview
- Unreal In-Game Recording
- In-Game Recording Comparison: Build vs OBS vs FFmpeg vs LIV

.png)